Working with the Amazon Chime SDK
I was one of those people that were pleasantly surprised, waking up one morning earlier this month, to the news of Slack announcing a partnership with AWS. While the decision to adopt or strengthen their AWS posture isn't exactly something new for a lot of companies, the real standout for me was that Slack will also migrate their voice and video call functionality to use the Amazon Chime service moving forward.
Now, I use Slack very significantly in my day-to-day, and Slack already has voice and video calls available, so actively migrating that functionality over to a different platform feels like a really major move.
So, in the spirit of discovery, wonder, and that itch to build, I spent a bit of time working with the Amazon Chime service to get a better feel of what it has to offer.
The skinny
The Amazon Chime SDK allows you to create managed online meetings where attendees can do simultaneous audio and video streaming, as well as share content across all attendees (e.g. a screen share). It does a great job of abstracting a lot of the details away, so you (as the developer) won't have to deal too much about the intricacies of working with websockets, WebRTC, and media handling.
Even better, you don't need to create servers and storage to support your users --- the technology resources required to run your meetings are automatically managed for you. This means that you don't have to think about how much infrastructure to prepare to potentially support so and so amount of users; all of it just automatically adjust and scale for you.
At the time of this writing, the pricing for the Amazon Chime SDK is also very cost-effective: it amounts to just USD 0.0017 / minute connected for every attendee. Easy.
To successfully create and run an online meeting on Chime essentially requires two steps:
- Create the Chime meeting
- Connect attendees to the Chime meeting
Creating an Amazon Chime meeting
Creating the actual Chime meeting is done using the AWS SDK. This is the general SDK that's used for most of the stuff you can do on the AWS platform. (Yes, the Amazon Chime SDK is different --- we'll get to that in a bit.)
import { Chime } from 'aws-sdk'

const chime = new Chime({ region: 'us-east-1' }) // :: has to be us-east-1 for now

/** @returns {ChimeMeetingInstance} */
async function createChimeMeeting() {
  const params = {
    ClientRequestToken: 'some-random-string-of-your-choice',
    MediaRegion: 'ap-southeast-1', // :: where your call is actually hosted
  }

  return await chime.createMeeting(params).promise()
}
The instance of the AWS.Chime object currently has to be in us-east-1.
This is not where your Chime meeting will be hosted; you can specify that using the MediaRegion field on the call to Chime.createMeeting(...).
Attendees that you want to bring into the meeting will also require a sort of join ticket. Later, back at the actual client application, users that want to join a Chime meeting will need to present attendee information that was explicitly generated for them.
/**
 * @param {ChimeMeetingInstance} meetingInstance
 * @returns {ChimeMeetingAttendee}
 */
async function createChimeAttendee(meetingInstance) {
  const { MeetingId } = meetingInstance.meeting
  const params = {
    MeetingId,
    ExternalUserId: 'unique-user-identifier',
  }

  return await chime.createAttendee(params).promise()
}
After that, you just have to give the client application both the meeting and attendee information, and they can use that to actually connect themselves into the meeting.
For example, if you were using AWS Lambda behind an API Gateway, you might be doing it like this:
async function handler() {
  const meeting = await createChimeMeeting()
  const attendee = await createChimeAttendee(meeting)

  const payload = { meeting, attendee }

  return {
    statusCode: 200,
    body: JSON.stringify(payload),
  }
}
Connecting to an Amazon Chime meeting
Back on your client application, you will need both the meeting and attendee information we generated above to complete the connection to Amazon Chime.
Also as mentioned above, the Amazon Chime SDK is different from the AWS SDK --- this is probably because client applications (like a web app, or mobile app) don't need all the functionality behind the main SDK, and are just interested in connecting to the meeting.
There are also Amazon Chime SDKs for iOS and Android, if you need them.
npm install --save amazon-chime-sdk-jsConnecting to a Chime meeting is very straightforward. Once you have both a meeting instance (which can be shared across all attendees), and an attendee ticket (which is unique to every attendee), you can then use the Chime SDK to complete the connection.
import {
  ConsoleLogger,
  DefaultDeviceController,
  DefaultMeetingSession,
  LogLevel,
  MeetingSessionConfiguration,
} from 'amazon-chime-sdk-js'

const logger = new ConsoleLogger('Chime Logs', LogLevel.INFO)
const deviceController = new DefaultDeviceController(logger)

// ...

/**
 * @param {ChimeMeetingInstance} meeting
 * @param {ChimeMeetingAttendee} attendee
 * @returns {ChimeMeetingSession}
 */
function connectToChimeMeeting(meeting, attendee) {
  const meetingConfig = new MeetingSessionConfiguration(meeting, attendee)
  const meetingSession = new DefaultMeetingSession(
    meetingConfig,
    logger,
    deviceController
  )

  // TODO --- configure other stuff for the meeting

  console.log('Starting the Chime meeting!')
  meetingSession.audioVideo.start()

  return meetingSession
}
The Chime SDK will take care of abstracting out the details of juggling your websockets, attendees syncing, content and media shares, etc. Pretty convenient!
Connecting audio
So, doing everything above gets you in the Chime meeting, which gives you ready access to everything that's being thrown around in there --- but unless you bind those things to actual elements in your client application, you won't see a lot of use here.
One thing you will want to do is configure audio --- both sending out the audio coming from your machine, and playing the audio that you are receiving (coming from everyone else on the call). The Chime SDK does a great job of simplifying this, but you still need to push it a bit more.
To specify what audio device to use as an input (most of the time, this will be your microphone), you can do the following. The Chime SDK will automatically bind the audio coming in through the selected device, and broadcast that across all attendees in the meeting.
/** @param {ChimeMeetingSession} session */
async function setMeetingAudioInputDevice(session) {
  // :: This will select the default audio input device on your machine, generally.
  //
  // :: You will probably want to let the user select
  //    which device they specifically want to use.
  const availableAudioInputDevices = await session.audioVideo.listAudioInputDevices()
  const deviceId = availableAudioInputDevices[0].deviceId

  await session.audioVideo.chooseAudioInputDevice(deviceId)
}
To actually play the audio that you receive in the meeting (e.g. someone speaking), you need to bind an <audio> element on your page using the Chime SDK.
<!-- we just need this somewhere on the page -->
<audio id="my-audio-element"></audio>
/** @param {ChimeMeetingSession} session */
function bindMeetingAudioOutput(session) {
// :: or however you prefer to get a reference
// to the <audio> element above
const audioElement = document.getElementById('my-audio-element')
session.audioVideo.bindAudioElement(audioElement)
}Connecting video
Connecting and displaying video and content is done pretty similarly to audio above.
To share video out into the Chime meeting (like, for example, your webcam output), you need a MediaStream object you can pass through the Chime SDK.
If you're already using a third-party library to capture and display what your camera sees onto the page (e.g. react-webcam for React), there's a good chance that it also exposes a MediaStream object you can readily use.
To broadcast out a video stream:
/**
 * @param {ChimeMeetingSession} session
 * @param {MediaStream} videoStream
 */
async function broadcastVideo(session, videoStream) {
  await session.audioVideo.startContentShare(videoStream)
}
If you just want to share what's on your screen though, the Chime SDK has a convenience method that does this for you automatically:
/** @param {ChimeMeetingSession} session */
async function shareScreen(session) {
  await session.audioVideo.startContentShareFromScreenCapture()
}
To display incoming video you're receiving through the Chime meeting, you will need to bind to a <video> element just like with <audio> above.
However, unlike with audio, you will need to determine when video content is actually being shared. My guess here is that this is because, unlike with audio where it's trivial to combine multiple audio signals together into one, with multiple video streams, you will need to handle them one by one. So you will actually need to listen in on how what video streams are being shared (e.g. multiple webcams, screen shares, etc), and bind them to individual <video> components as you see fit.
To do this, you will need an observer object that has a .videoTileDidUpdate(...) method implementation, and register that into the meeting session. This observer will be notified whenever video content is started or stopped in the meeting, so you can adjust accordingly.
<!-- Again, you will need video elements on the page.
     Unlike with audio elements though, you may want to have to create these dynamically,
     since you may need more than one element at a time.
-->
<video id="my-video-element"></video>
/** @param {ChimeMeetingSession} session */
function displaySharedVideoContent(session) {
const observer = {
// :: a tile represents a single instance of shared video content
videoTileDidUpdate: (tile) => {
console.log('Received content with ID:', tile.tileId)
// :: TODO: get a video element specifically for this tile
const videoElement = document.getElementById('my-video-element')
session.audioVideo.bindVideoElement(tile.tileId, videoElement)
},
}
session.audioVideo.addObserver(observer)
}That should be it!
You'll probably also want to know how to pause or stop content shares, mute your audio, see who the attendees are in your meeting --- all of those are in the documentation for the Amazon Chime SDK.
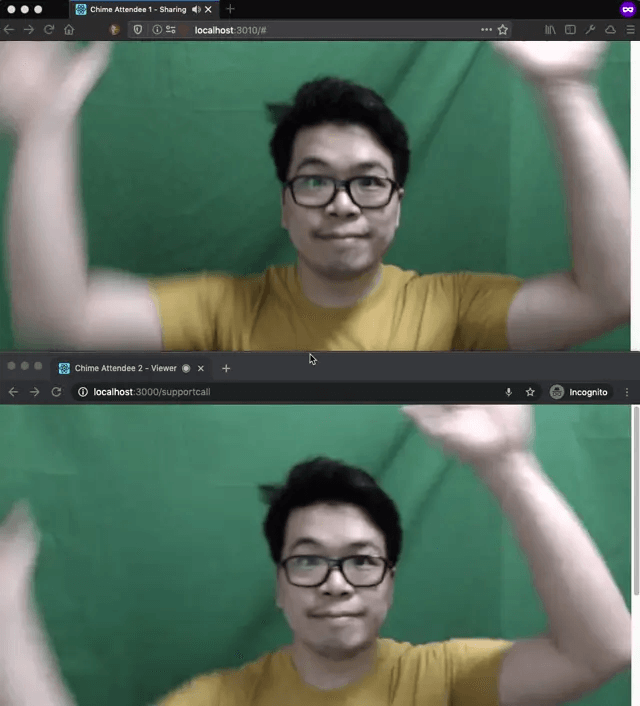
As a sort of cherry on top, here's me making a fool of myself testing the Chime meeting video latency. The Chime meeting here is hosted in the AWS Singapore region (ap-southeast-1), with me being in the Philippines.